
Hello! I hope that you found my previous article about starting photography interesting. This article aims to help those with DSLRs (digital singular-lens reflex) Cameras learn their settings.
One of the first and most important things to learn about your camera is what mode you are in. This ranges from auto, portrait, landscape, food, sports, and manual. Most photographers use the mode manual, which allows full control over all the settings in a camera.

Here’s a list of what each letter stands for in the picture above:
- A-Dep = Automatic Depth (of Field)
- M = Manual
- Av = Aperture Priority
- Tv = Shutter Priority
- P = Program
- Green Box = Auto
- No Flash
- CA = Creative Auto
When starting out, try the Auto mode for the first couple of times. However, as you continue using your camera, you’re going to want to learn how to use manual mode.
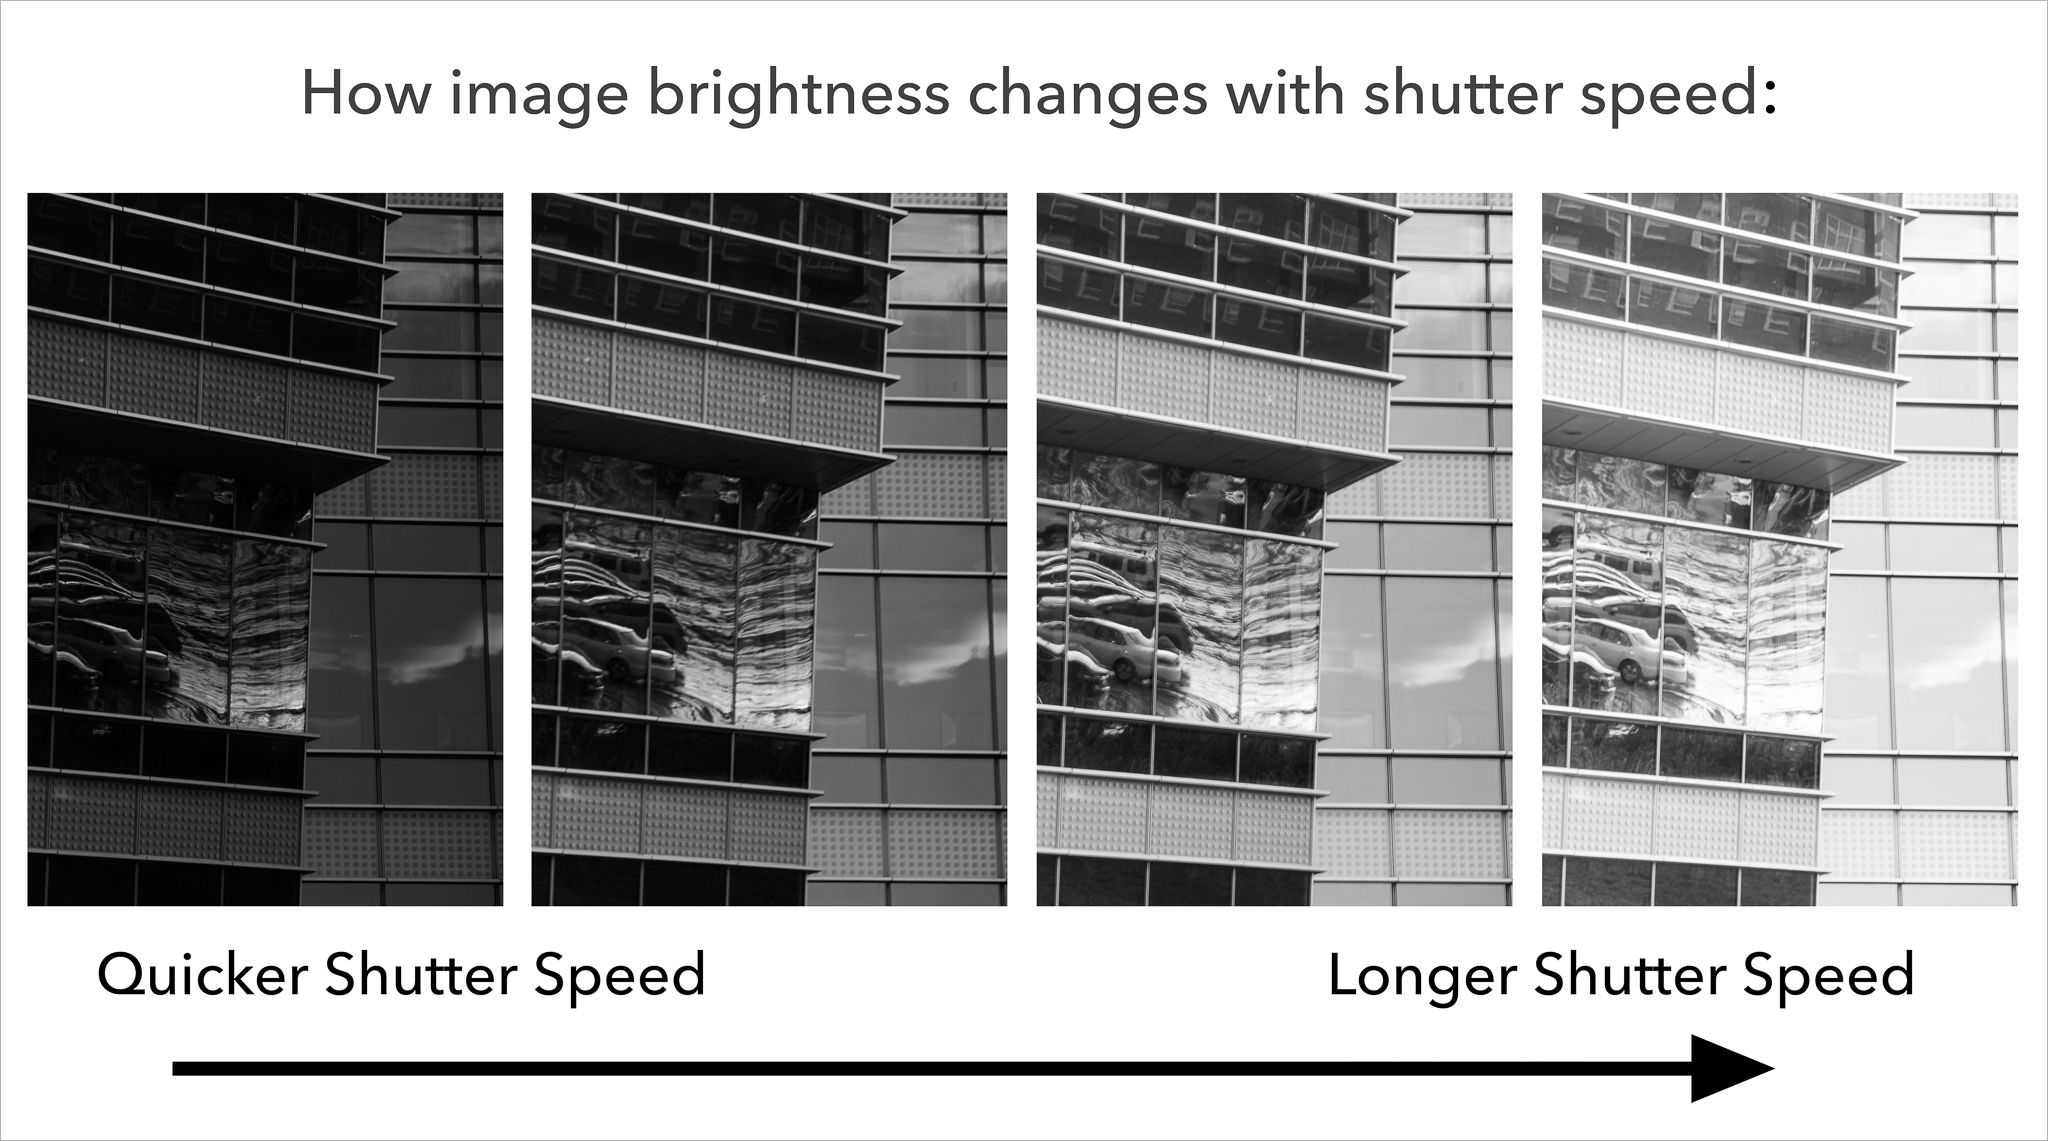
Next, you will want to learn the settings of a camera. The first is shutter speed, which controls how long (or short) your camera’s lens is open. Shutter speed is measured in seconds, and can go down to 1/1000 of a second on most cameras. The smaller your shutter speed is, the less light will enter your camera (and the faster it will capture a movement); use a small shutter speed when taking pictures of movement, or in bright spaces. Slower shutter speeds such as 5 seconds are often used for light painting, or for night photography. You can adjust your shutter speed by using the shutter speed dial, this is different for each camera, so make sure to search it up. I know this is probably confusing, so I’ll insert some helpful articles/videos at the end!

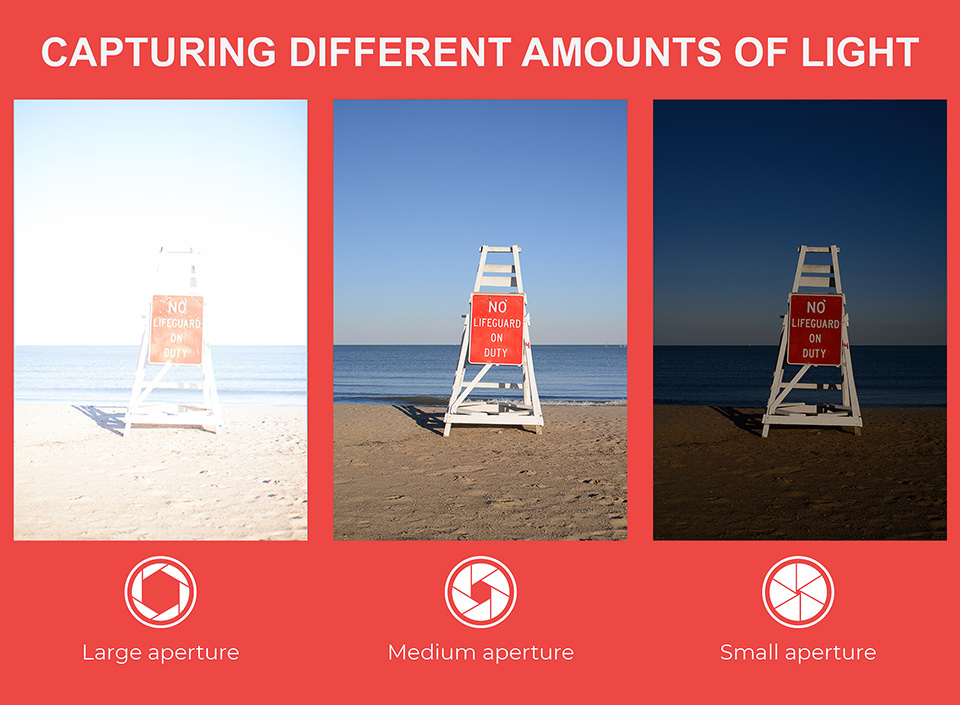
Another important setting is the aperture, also known as the pupil in your camera lens. According to Photography Life, “Aperture can be defined as the opening in a lens through which light passes to enter the camera” (Photography Life). Controlling your aperture makes the opening in the lens bigger or smaller. It is expressed in f-stops. A small aperture makes the hole in the lens smaller, meaning less light will come through. However, a large aperture will make more light come in. In addition to lighting, this setting affects your depth of field (what is shown in your photo–focused or unfocused). Aperture is confusing to learn about, so I’ll link a video in this article.
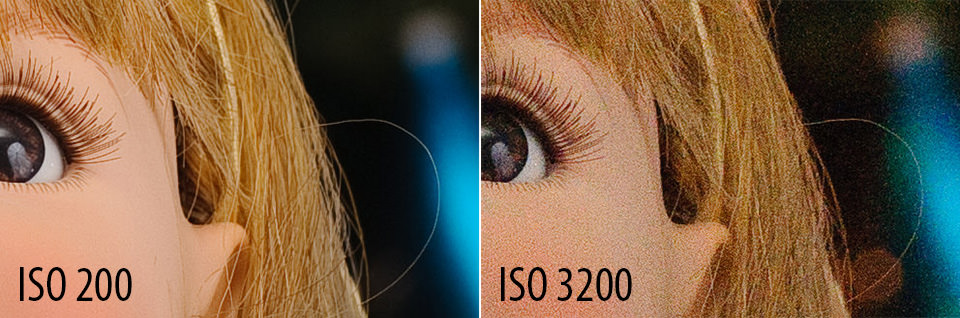
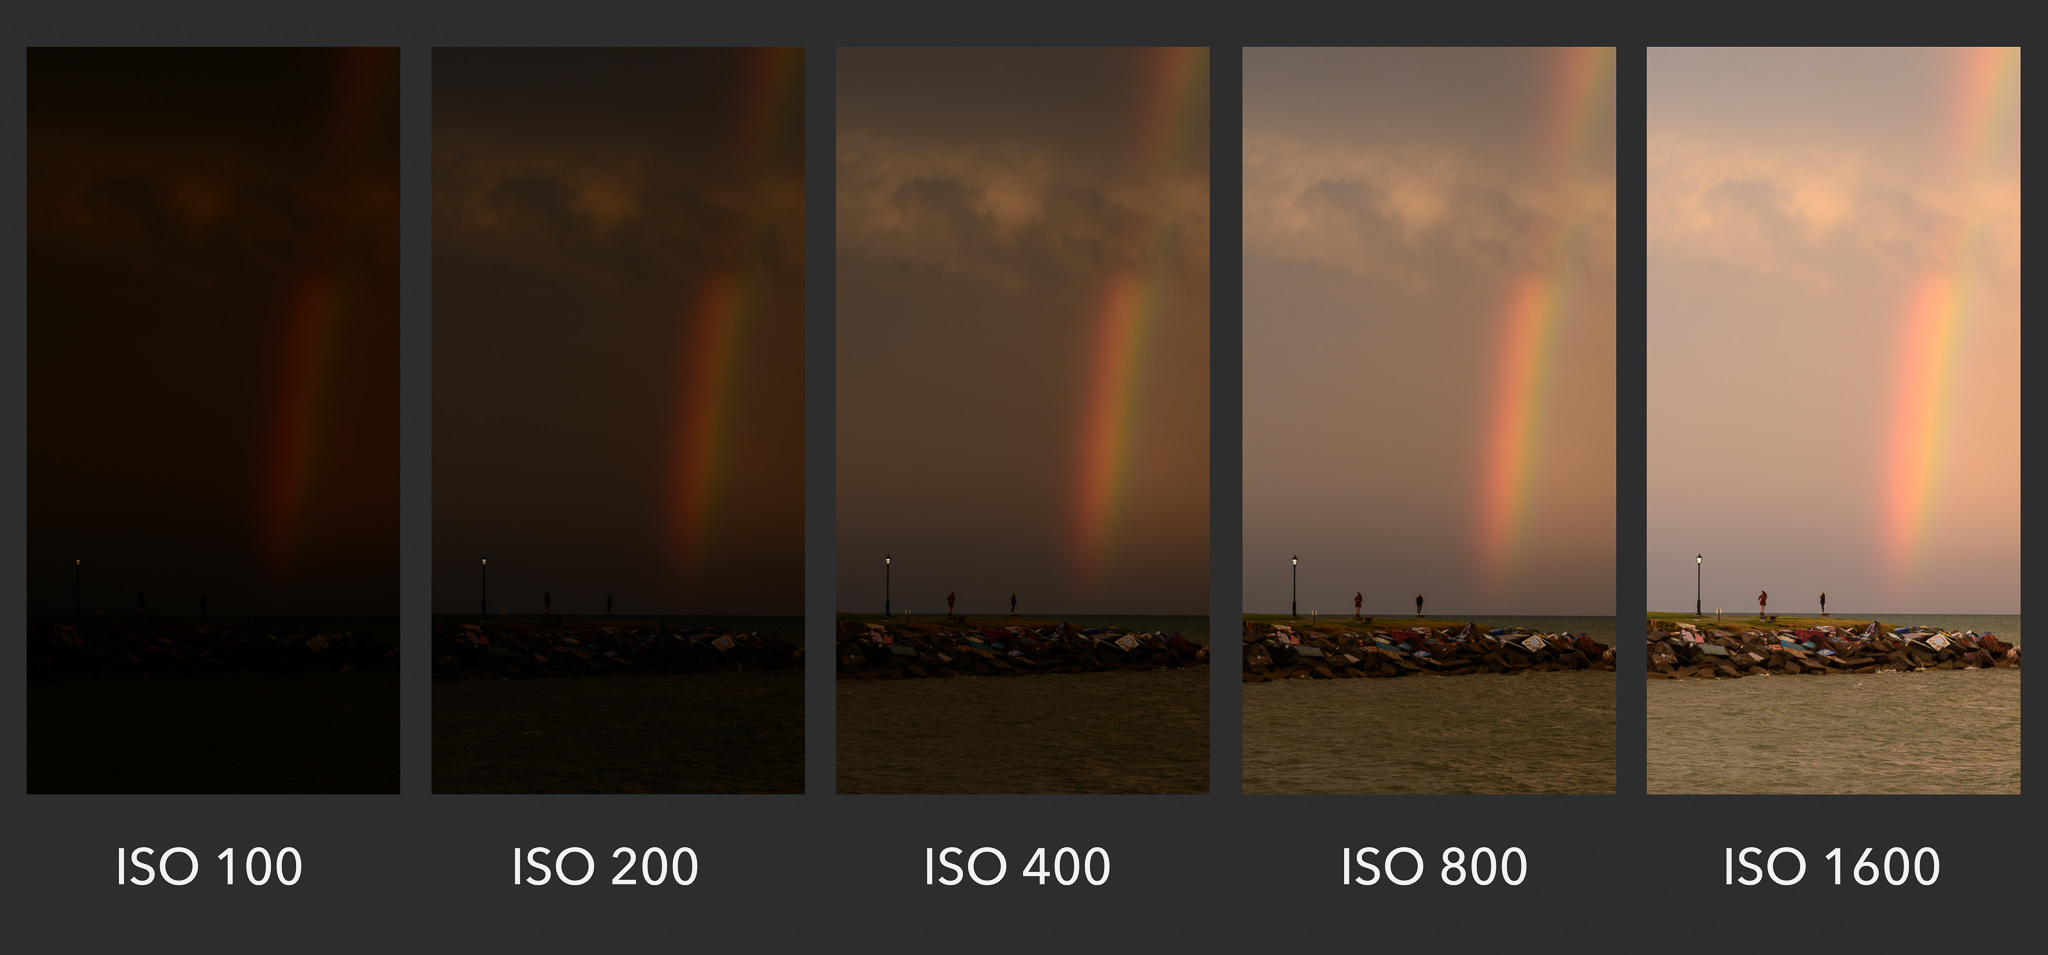
Finally, you’ll need to know the setting ISO. To simplify this term, ISO is a setting that will brighten or darken your photo. An ISO of 100 will darken your photo, but an ISO of 500 will brighten it. However, when using a high ISO, it creates noise–or graininess. You can adjust your ISO by pressing the ISO button on the right-hand side of your camera.
Hopefully, this article was helpful! Below are some helpful articles and videos that explain the concepts better than me.
Camera Modes: article
Video of an Overall Summary
