Spicy Tuna on Crispy Rice

Estimated Baking Time: 1 hour and 45 minutes

This is a spicy and savory dish ready for anyone to make!

Ingredients:

  • 2 cups of sushi rice
  • Tuna (make sure it is sushi grade)
  • Mayonnaise
  • Sriracha
  • Vegetable or Canola oil
  • One avocado
  • Scallions (optional)
  • Seaweed
  • Sesame seeds (optional)

Sushi Rice:

To make sushi rice, you first need 2 cups of sushi rice, 2 tablespoons of sugar, one teaspoon of salt and a third cup of rice vinegar. Regular vinegar won’t work for this recipe.

Rinse the rice with cold water until the water is clear, then pour it into a pot with 2 cups of lukewarm water. Let it sit there for 30-45 minutes. Cook it in a rice cooker on the sushi mode for 10-15 minutes. After it is done, let it sit for 15 minutes. In a pot, combine the sugar, rice vinegar and salt. pour it over the sushi rice and combine. Let it rest until needed.

Spicy Mayonnaise:

Combine 4 tablespoons of mayonnaise to 3 tablespoons of sriracha. Then add one teaspoon of sugar and one teaspoon of soy sauce. This is option but finely chopped scallions can be added in as well.

Spicy Tuna:

Finely chop or mince the tuna into an almost paste like form. Combine the spicy mayo with the tuna. Mix thoroughly. Add a bit of sugar and salt until its to your liking.

Crispy Rice:

Now shape the now chilled sushi rice into squares before transferring them into a pan with canola oil. Fry each side until golden brown. Transfer them onto a plate after finishing.

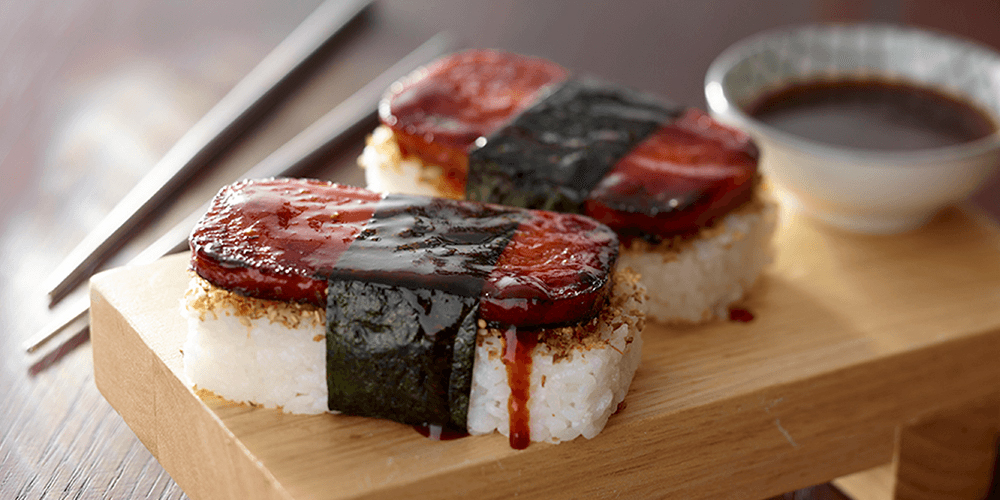
Now slice up your avocado and put thin slices on the rice. Pieces of shredded seaweed can be tossed onto there as well. Put a spoonful of spicy tuna onto the mixture and sprinkle with sesame seeds. And you are done! Enjoy!

Fuel Your Travels with These Delicious and Nutritious Snack Ideas

Airplane travel can be exciting and tiring, especially for a teen like me. Amidst the anticipation of the journey, hunger pangs can strike unexpectedly. It’s essential to be prepared to ensure a smooth and satisfying trip. Packing the best snacks is crucial-easily accessible, healthy, and delicious snacks that won’t create a mess in the confined space of an airplane cockpit. Here are a few snacks I plan to bring on my upcoming trip. Let’s explore some delectable options that will satisfy my teen’s appetite and energize me throughout my journey.

  1. Fruit Medley: A delightful assortment of fresh fruits is perfect and easy to pack. Wash and cut your favorite fruits, such as apples, grapes, berries, and oranges. Place the cut-up fruits in a resealable container or small zip-lock bags. Not only are fruits rich in vitamins and antioxidants, but they also quench your thirst and provide a refreshing burst of natural sweetness.
  2. Nutty Delights: Nuts are a great source of healthy fats, proteins, and essential nutrients. Create a custom mix of your favorite nut, such as almonds, walnuts, and cashews. Add dried fruits like apricots or cranberries for a savory and crunchy snack. Portion them into small containers for easy snacking during the flight.
  3. Veggie Sticks with Hummus: Cut various veggies into sticks to dip with hummus. Crunchy carrot sticks, celery, cucumber, and bell pepper slices paired with a small container of hummus make for a healthy and delicious snack combo. Vegetables are packed with fiber and vitamins, while hummus adds a creamy and flavorful touch to the snack and provides healthy fat.
  4. Cheese and Whole Grain Crackers: Cheese is an excellent source of calcium and protein, making it a filling and nutritious choice for teens like me. Individually wrapped cheese sticks or small cheese cubes with whole-grain crackers for a satisfying and balanced snack. I have gluten allergies, so I usually pack rice, lentil crackers, and vegan cheese like Daiya. If you have food allergies, be careful to choose the cheese and crackers you like. 
  5. Granola Bars: Preferably homemade or store-bought, granola bars are a convenient option to keep hunger at bay. These are easy to make. Mix the Nutty Delight on #2 with almond or nut butter, roll them into coconut flakes, and have an excellent granola bar. But there are many options if you prefer to buy them. Look for bars that are low in added sugars and high in fiber, providing a quick energy boost during the journey.
  6. Protein-Packed Sandwiches: Prepare sandwiches with whole-grain bread, lean meats like turkey or chicken, or smoke salmon; if you want to be fancy, add lettuce, tomato, and a light spread like mustard or avocado. These protein-packed sandwiches will you satisfied and provide essential nutrients.
  7. Energy Bites: Create homemade energy bites with oats, nut butter, honey, and add-ins like chia seeds, dried fruits, or dark chocolate chips. These bite-sized treats are tasty and provide a great energy source during travel.
  8. Yogurt with Berries: yogurt is rich in protein and calcium, and when paired with fresh berries or a drizzle of honey, it becomes a delectable and nutritious snack.
  9. Rice Cakes with Nut Butter: Rice cakes are a lightweight, mess-free alternative to regular crackers. Spread nut butter (like almond, Macadamia, or cashew butter) on top, and add dry fruits and chocolate chips for a satisfying and healthy snack.
  10. Dark Chocolate: Satisfy a sweet tooth with a small amount of dark chocolate. Dark chocolate is delicious, contains antioxidants, and can boost mood during long flights.

Use reusable containers or eco-friendly bags to pack healthy snacks to minimize waste and be mindful of potential allergies or dietary restrictions. Remember to stay hydrated by carrying a refillable water bottle and avoid excessive sugary beverages or energy drinks. Also, when you pack many high-water content fruits and veggies, such as cucumbers and watermelon, you can easily stay hydrated and need less water. 

Preparing various easy-to-pack, healthy, and delicious snacks for airplane travel can ensure a satisfying journey without feeling sluggish or hungry. The key is to balance taste and nutrition, making the travel experience enjoyable and stress-free. 

Bon voyage!

Bella H.

How to Make French Toast

This summer, I started making my own breakfast almost every day. Apparently I have a high taste for food because I started making myself things like crêpes, waffles, omelets and FRENCH TOAST. I found this French toast recipe online, tweaked it a teeny tiny bit and eat it maybe once a week now. 

THE RECIPE

Prep Time: Approximately 2 minutes or less

Cook Time: Maybe 3-5 minutes

Ingredients

  • ⅓  cup of milk
  • 1 eggs
  • ½  teaspoon of vanilla extract (Optional) (I put it in for flavor and once did not have enough, but it was still delicious. I recommend putting the vanilla in)
  •  ≈ ¼ teaspoon of cinnamon (Optional) (I put more in and dust the toast while its cooking)
  • Salt (If you want, I dont put any)
  • 3 pieces of bread 
  • Butter to grease the pan

Step 1

Get all of your ingredients and whisk everything but the bread and butter together in a shallow bowl. (I use a cereal bowl)

Step 2

Butter your pan and heat over high heat

Step 3

Dunk your bread in your milk mixture for 3 seconds on both sides. I also sink the crusts.

Step 4

Move your bread onto your hot pan and lower the temperature to medium heat. Cook until the crusts are golden brown, (like the color of almonds or dulce de leche)

Step 5

EAT YOUR DELICIOUS CREATION. I prefer to top mine with maple syrup and more cinnamon.

I really like this recipe and think that it’s really easy to make while half asleep in the morning. I do recommend it for any people who like sweet breakfasts that don’t require much cooking.

Home Ec: Coffee Cake!

Estimated Baking Time: 35 minutes

An easy yet delicious cake recipe fit for beginners and intermediate bakers to use!

Ingredients:

  • 5 eggs
  • 40 grams of brown butter (directions below)
  • 145 grams of sugar
  • 3 grams of salt
  • 20 grams of milk or buttermilk
  • 70 grams of coffee (black coffee is preferred)
  • 135 grams of flour (all purpose flour or cake flour)
  • 5 grams of vanilla extract

Directions for brown butter:

Brown butter is one of my favorite and most crucial ingredients to making a great cake. Heat up your 40 grams of butter in a small saucepan. Don’t be nervous when your butter begins to turn brown. Around 3-4 minutes later, your butter should be a golden brown color and smelling very nutty. From that point on, take it off of the heat and drop in a small icecube. Stir vigorously and after the icecube is incorporated, leave it to cool before using!

Directions for whipped cream and vanilla milk: 

Use heavy whipping cream and mix with your electric mixer or hand whisk. Mix and add in sugar and salt until its to your desired consistency and taste. Vanilla milk is just milk with a teaspoon of vanilla! Add in sugar until your desired taste is reached. 

Directions for Coffee Cake:

  1. Separate your five eggs into yolks and egg whites. Be careful not to break the yolks and put them into separate bowls. 
  2. With your electric mixer or hand whisk, whisk the egg whites until you reach stiff peaks. While mixing, incorporate 80 grams of sugar a bit at a time.
  3. Moving onto the egg yolks, incorporate the rest of the sugar slowly. Add in the vanilla extract and salt while mixing vigorously. Slowly add in 30 grams of the coffee and your milk into the mixture as well. Mix well. (Save the remaining coffee for later)
  4. Preheat the oven to 375 Fahrenheit for 25 minutes 
  5. Using a spatula, fold in your egg yolk mixture VERY VERY carefully into your egg whites. Make sure NOT to stir but instead fold the mixture or draw a S over and over until thoroughly incorporated. Stirring will dissolve or pop all of the air bubbles that were created resulting in a denser cake.
  6. Slowly add in your flour a bit at a time, be careful to make you sure FOLD and NOT STIR the mixture. 
  7. Grease your cake mold with butter or line with parchment paper.
  8. After mixing well, pour the cake batter slowly and carefully into a cake mold. Tap out air bubbles by dropping the mold on a steady counter 3 times. 
  9. Place into the oven and wait until fully cooked. Use a toothpick to test if the cake is completely cooked. If there is still wet batter stuck on the toothpick, put it back in for 5 more minutes.
  10. Carefully remove the cake and as soon as it is out, poke a bunch of holes in the cake. Now with the remaining coffee, mix it with sugar and a bit of milk. Brush this onto the cake, making sure it absorbs.
  11. Let it chill before slicing and topping with whipped cream with a side of milk. Enjoy!

Let’s Make Sushi: Easy Recipe to Try at Home!

Sushi is one of the most popular foods in our country, and I love to eat it every day if I could. It’s one of the most nutritious foods because of the combination of ingredients used to make sushi. Also, it’s not deep fried, so there’s no worry about cholesterol or fat. Sushi is delicious and nutritious; each sushi roll includes high-quality protein (fish or caviar). We all need protein for repairing and rebuilding tissues, muscles, and everything else in our body. Fish is rich in omega-3 fatty acids essential for the brain and heart. Also, it helps in the reduction of inflammation and lower chronic diseases. All the vegetable in sushi provides abundant mineral and vitamins necessary for overall health.
So what are we waiting for? Let’s make a sushi roll together and see why every kid should have sushi once in their lifetime.
First, gather all your ingredients. Here is what you need:

  • 2 cups of cooked sushi rice, aka short grain rice cooked; follow the directions on the rice’s box.
  •  4-6 sheets of seaweed (raw or roasted)
  •  4 -6 oz smoked salmon
  •  1 small cucumber sliced into long sticks
  •  1 medium carrot cut into small finger-size sticks.
  •  1 Avocado sliced.
  • Caviar for topping (optional)
  • 1 tablespoon Rice vinegar 

Instruction: 

1. Cook the short-grain rice according to the instructions on the box.

2. Once cooked, add 1 tablespoon of rice vinegar to the rice and 

 stir to incorporate.

3. Lay a sheet of nori seaweed on a bamboo sushi mat with the shiny side facing down.

4. Spread a thin layer of cooked rice evenly over the nori sheet leaving about an inch at the top uncovered.

5. Layer smoked salmon, cucumber, carrot, and avocado on the rice. 

6. Use the bamboo mat to roll the seaweed like you roll up the sleeping bag; the tighter, the better. Starting from the bottom end.

7. Use a sharp knife and cut about an inch per piece or the size that fits perfectly in your mouth. Top with caviar if you want more omega or just want to be fancy.

Now, enjoy your hard-earned labor!

Bella H.

New England Clam Chowder

The creamy soup in this New England Clam Chowder dish is infused with flavorful bacon, succulent clams, basic spices, and perfectly cooked potatoes. You’ll believe that this is restaurant quality!

  • Ingredients:
  • ▢ 6 strips thick-cut bacon
  • ▢ 2 tablespoons butter
  • ▢ 1 medium yellow onion
  • ▢ 2 ribs celery
  • ▢ 3 cloves garlic
  • ▢ 1 teaspoon hot sauce
  • ▢ 1 teaspoon Worcestershire sauce
  • ▢ 1/3 cup flour
  • ▢ 1 cup chicken broth
  • ▢ 3 cups Half and Half
  • ▢ 8 oz. clam juice
  • ▢ 1 chicken bouillon cube
  • ▢ 1 bay leaf
  • ▢ 1 ¼ lbs. potatoes, see notes
  • ▢ 3 (6.5 oz. cans) chopped clams, juices reserved
  • ▢ Fresh parsley & Freshly cracked pepper, for serving
  • ▢ ½ teaspoon each: dried oregano, dried parsley
  • ▢ ¼ teaspoon each: dried thyme, salt
  • ▢ 1/8 teaspoon each: smoked paprika, pepper
  • Directions:
  • 1. Cook the bacon in a 4.5-quart soup pot slowly over low heat. While the bacon cooks, measure out the remaining ingredients. Once the bacon is cooked, set it aside on a paper towel-lined plate. Chop once cooled and reserve 2 tablespoons of bacon drippings.
  • 2. Wipe any dark spots from the pot but leave as many bacon remnants as possible, adding flavor to the soup.
  • 3. Add reserved bacon drippings and butter to the pot over medium heat. Add the diced onions and celery. Toss to coat and soften for 5-6 minutes. Add the garlic, hot sauce, Worcestershire sauce, and seasonings. Cook for 1 minute.
  • 4. Add the flour and cook for 2 minutes stirring continuously, until the raw flour smell is gone.
  • 5. Add the chicken broth, stirring continuously, and add the half and half in the same manner.
  • 6. Stir in the chicken bouillon- and add the bay leaf. Add the juice from the canned clams to the soup, but don’t add the clams yet. Stir in the additional clam juice.
  • 7. Bring the soup to a gentle boil, then reduce it to a simmer, so that it’s just gently bubbling. Simmer for 20 minutes, partially covered. Stir occasionally as it cooks.
  • 8. Peel and dice the potatoes and add them to the soup. Bring back to a very gentle bubble and let the potatoes cook through for 20-25 minutes, until fork tender. Reduce heat to low.
  • 9. Stir in the clams and let them heat through for about 5 minutes. Remove the bay leaf.
  • 10. Ladle soup into serving bowls and garnish with roughly chopped parsley, fresh pepper, and chopped bacon.

Enjoy!

My Time in Pasadena

Last weekend, I went to a major swimming event called the Spring Junior Olympics. The event was located in Pasadena, so it was a long drive from our home. It was very exciting! It was my first time attending, and it was a lot of fun! My mom, sister and I stayed  at a Marriott hotel called Springhill.

Although I didn’t make it back to the finals, I enjoyed swimming there because it gave me a chance to compete against the best swimmers from around the state. Sure, there were some bumps along the way, such as when my coach (Coach Cho) took us to the hottest lanes for warm up. I thought I was going to have a heat-stroke! It was worse than a sauna turned up at full heat! But overall, it was pretty enjoyable.

One of my favorite parts of this experience was going to the mall and the food we ate there. Our hotel was close to many food places, so every day after we finished swimming our events, we would go to different restaurants to try out different types of cuisine. My all-time favorite place was Ramen Nagi. It was a Japanese noodle restaurant. It was SO good! I ordered the “Luscious Signature Tonkusu Pork Broth”. It had a rich taste of sesame and seaweed, and needless to say, I finished that entire bowl of soup and ramen. So good that I actually asked my mom for another bowl(she said no). After we ate out, we would then walk around the mall. I was awed by the sights around me. My mom did get pretty upset at the fact that I stopped to go into every single toy store I could find, but that wasn’t the point. My mom stopped by a couple of stores to see what type of items they sold. She is really into Chinese and Japanese Ramen, so we bought a couple of instant ramen for her. To wrap it all together in one day, my mom decided to buy my sister and I each a boba. Without a doubt, it was delicious. The point is, I really enjoyed my time at Pasadena and swimming at the Rose Bowl Aquatics.

The Best Chocolate Chip Cookies Ever

Anyone who stays at the DoubleTree knows that the best part is the warm welcoming cookies homemade by the hotel. If you are opposed to making a reservation just for the famous cookies, this recipe is just for you.

Ingredient List:

Chocolate Chip Cookies

  • ▢ 1/2 pound of softened butter (2 sticks)
  • ▢ ¾ cup + 1 tablespoon granulated sugar
  • ▢ ¾ cup packed light brown sugar
  • ▢ 2 large eggs
  • ▢ 1 ¼ teaspoons vanilla extract
  • ▢ ¼ teaspoon freshly squeezed lemon juice
  • ▢ 2 ¼ cups flour
  • ▢ 1/2 cup rolled oats
  • ▢ 1 teaspoon baking soda
  • ▢ 1 teaspoon salt
  • ▢ A pinch of cinnamon
  • ▢ 1 3/4 cups chopped walnuts (optional) 
  • ▢ 3 cups semi-sweet chocolate chip
  • 1. Preheat the oven to 300°F
  • 2. Cream butter, sugar, and brown sugar in the bowl of a stand mixer on medium speed for about 2 minutes.
  • 3. Add eggs, vanilla, and lemon juice, blending with a mixer on low speed for 30 seconds, then medium speed for about 2 minutes, or until light and fluffy, scraping down the bowl.
  • 4. With the mixer on low speed, add flour, oats, baking soda, salt, and cinnamon, blending for about 45 seconds. Make sure not to overmix.
  • 5. Remove bowl from mixer and stir in chocolate chips and walnuts.
  • 6. Portion dough with a scoop (about 3 tablespoons) onto a baking sheet lined with parchment paper about 2 inches apart.
  • 7. Optional: Sprinkle a pinch of salt on top of each cookie to create a salty and sweet masterpiece.
  • 8. Bake for 20 to 23 minutes, or until the edges are golden brown and the center is still soft.
  • 9. Remove from the oven and cool on a baking sheet.

Enjoy!

-Harrison S.

How to Make Spam Musubi

Spam musubi is one of my personal favorite snacks to make whenever I have free time. Its a very simple dish to create using only a few ingredients.

Ingredient List:

Spam Musubi

  • ▢ 1.5 cup/310g Rice (uncooked)
  • ▢ 1 tbsp Toasted sesame seeds
  • ▢ 1 Nori seaweed sheet 
  • ▢ 1 can of small Spam 7oz(200g)
  • ▢ 2 tsp vegetable oil

Spam Sauce 

  • ▢ 1 tbsp soy sauce
  • ▢ 1 tbsp sake
  • ▢ 1 tbsp rice vinegar
  • ▢ 1 tbsp sugar
  • ▢ 2 tsp Katakuriko (potato starch)
  • ▢ 1 tbsp water
  • 1. Cook rice by the instructions listed on your rice cooker.
  • 2. Once the rice been cooked, sprinkle toasted sesame seeds into the rice.
  • 3. Slice the spam ham into 6 even slices.
  • 4. Heat a frying pan over medium heat with vegetable oil
  • 5. Add Spam. Cook and brown each side for about 2-3 min.
  • 6. Set aside the cooked spam slices. Then place all ingredients into the pan and reduce the heat to low.
  • 7. Stir continuously until thick, put the Spam slices back into the frying pan and coat the spam with the sauce. Turn the heat off.
  • 8. Next is to assemble the Spam. I like to use a specific mold for Spam, but if you don’t have one there is a very easy alternative. Line a washed spam tin with cling wrap and put 1/6 of the cooked rice into the tin.
  • 9. Press the rice down with your hand. Add a piece of spam on top and press.
  • 10. Remove the spam and rice, place the nori strip over on the centre of the spam and wrap over the musubi.

Enjoy!

-Harrison Schreiman

Quarantine Recipe: Homemade Peanut Butter Cups

Because the majority of us have been staying home with lots of time on our hands, especially as it’s the middle of  Summer, I thought I’d share how to make a fun homemade treat which only uses only a couple of ingredients. Homemade peanut butter cups may sound like too much work, but it’s actually quite an easy recipe and yields good results.

What You’ll Need:

Measuring cups

Saucepan or microwave-safe glass bowl

Tablespoon

Two muffin tins

Muffin liners

Ingredients: 

-2 Cups Chocolate Chips (I used semi-sweet, but you can use milk chocolate or dark if you prefer)

-½ Cup peanut butter

– 2 tablespoons coconut oil–optional 

Directions:

  1. Measure  the chocolate chips and melt them, either over the stove in a saucepan or in the microwave in a microwave-safe dish.  Also, a quick tip–I’ve heard that adding a few tablespoons of  coconut oil to your chocolate helps it melt into a smoother consistency, so you can add some to your chocolate if you’d like.
  1. While waiting for the chocolate to melt, line your muffin tins with muffin liners. Once the chocolate is evenly melted, begin spooning about a tablespoon of chocolate per muffin liner, or as much is needed to ensure that the bottom of the wrapper is covered entirely and evenly.
  1. Now, measure the peanut butter and place it in a bowl in the microwave for 30 seconds. Afterward, stir it gently and begin spooning about a tablespoon into each of your individual muffin liners. (This part can be a little messy, and I learned the hard way! I’d recommend putting your muffin tins with just the chocolate in the freezer until it hardens, that way when you’re ready to add the melted peanut butter, you’ll have a much easier time doing so.)
  1. Using the rest of your melted chocolate, spoon some chocolate on top of the peanut butter, enough until it fully covers the peanut butter beneath it; approximately one to two tablespoons. 
  1. Place the muffin tins in the freezer for 30 minutes to an hour, or until they are fully hardened. Once hardened, take them out and allow them to reach room temperature before serving. Enjoy:)